
Recently I wanted to find something in my own blog that I had written about and though I only have a small number of posts compared to some, it still took more time than it really should have.
So I decided to look at adding some search functionality; because I am originally from Yorkshire it should be free, because I am lazy it should be relatively easy. A quick google search (the meta-irony is not lost on me) and a few dead ends, I ended up trying Algolia. Now this looks like it is a really powerful search tool and I am nowhere near going to be using it to its fullest potential for this blog but the demos I have seen look amazing.
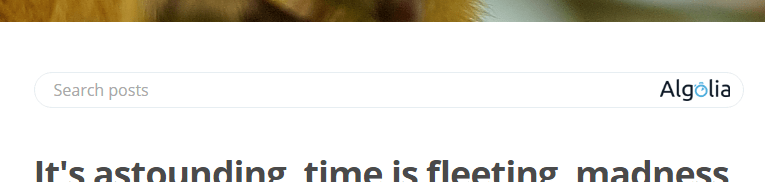
Now it was so simple to get going I thought I should share what I did to actually integrate it to my site (and so add to the myriad of other tutorials on the subject). First you've probably already seen the search on the main index page but if not this is what it looks like
and when searching
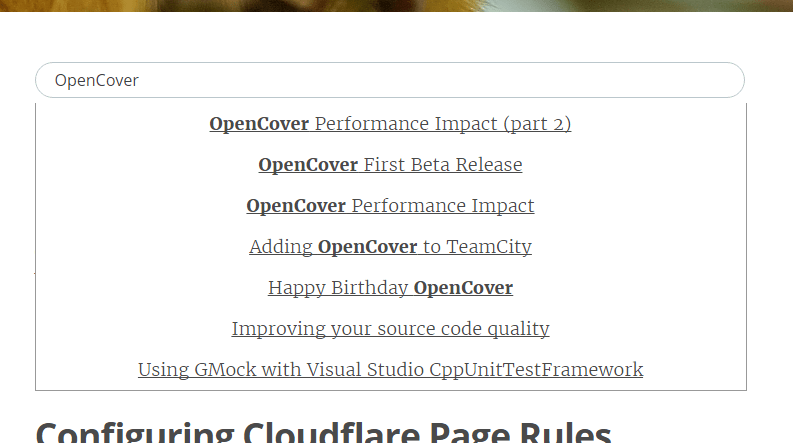
okay it's not the prettiest set of results at the moment however it is functional and I can tweak it later.
Getting Started
Once signed up and goingskipping through the tutorial you arrive at a dashboard where you can create an application and choose a region. It is explained and if your user-base is largely based in a single region then this is really useful but otherwise I was a little confused so I just choose the place nearest to where the blog is hosted, which is probably the same region.
Once the application was created I was stuck (did I mention there was a tutorial?), I expected to find an "index this site" button or feature but it seems Algolia is API based and no such options existed for mere mortals like me.
Loading the search index
Another quick investigation and I came across an npm package named algolia-webcrawler which can be given a sitemap.xml and crawl the site/blog based on its contents. I took the sample config.json and modified it up to look a bit like so.
{
	"app": "blog.many-monkeys.com",
	"cred": {
		"appid": "<<app-id-goes-here>>",
		"apikey": "<<admin-api-key-goes-here>>"
	},
	"oldentries" : 86400000,
	"index": {
		"name": "siteIndex",
		"settings": {
			"attributesToIndex": ["title", "unordered(description)", "unordered(text)"],
			"attributesForFaceting": ["lang"]
		}
	},
	"sitemaps": [
		{"url": "https://blog.many-monkeys.com/sitemap.xml", "lang": "en"},
		{"url": "https://blog.many-monkeys.com/sitemap-posts.xml", "lang": "en"}
	],
	"http": {
		"auth": ""
	},
	"selectors": {
		"title": "title",
		"image": "meta[property=\"og:image\"]",
		"description": "meta[name=\"description\"]",
		"text": "h1, h2, h3, h4, h5, h6, p, li"
	},
	"formatters": {
		"title": "-"
	},
	"defaults": {

	},
	"blacklist": [

	]
}
For some reason, that I obviously haven't yet investigated, it didn't work with just the main sitemap.xml and so I added the additional sitemap-*.xml files that I thought were valuable at this stage. Once the crawler was executed with the above config, I found that I had an index that I could use for searching my blog.
Adding search to the blog
I did find another tutorial about adding Algolia to a Ghost blog but it was in Japanese and Google translate didn't help me much but it did have a plain HTML snippet at the bottom that I shamelessly took and chopped up as necessary to use with my blog; these changes can be seen in this commit on GitHub.
The example didn't work out of the box as-is for me but it also didn't take long to get it running with a bit of debugging and tweaking.
{{!-- The main content area on the homepage --}}
<main id="content" class="content" role="main">
  <div style="text-align: center;">
<input type="search" placeholder="Search posts" id="search-input" />
  </div>

  {{!-- The tag below includes the post loop - partials/loop.hbs --}}
  {{> "loop"}}

  <script src="https://cdn.jsdelivr.net/algoliasearch/3/algoliasearch.min.js"></script>
  <script src="https://cdn.jsdelivr.net/autocomplete.js/0/autocomplete.min.js"></script>
  <script>
var client = algoliasearch('<<app-id-goes-here>>', '<<search-api-key-goes-here>>')
var index = client.initIndex('siteIndex');
autocomplete('#search-input', { hint: false }, [
  {
    source: autocomplete.sources.hits(index, { hitsPerPage: 7 }),
    templates: {
      suggestion: function(suggestion) {
        return suggestion._highlightResult.title.value.link(suggestion.url);
      }
    }
  }
]).on('autocomplete:selected', function(event, suggestion, dataset) {
  console.log(suggestion, dataset);
});
  </script>
</main>
Pros
- It works and is free, okay you have to drop the Algolia image on your site somewhere (I kept it in the search box where it made sense) but nothing really comes for free and it isn't that intrusive.
- Easy to setup and integrate, writing this post took longer than installing the search functionality.
- Multiple indexes - I can see these becoming useful if I start to tweak my integration so as to try different things out during development without affecting the current live-integration.
- There appears to be a strong community to get plenty of help/support; in fact the snippet I used above looks like it may have initially come from here.
Cons
- Could be simpler to get started with a built in webcrawler of some form from the dashboard itself - there could be some standard usage scenarios for blogs (they have a documentation indexer already so perhaps they are heading down that path).
- You have to run the webcrawler manually each time you publish a new post to the blog, though perhaps a IFTTT snippet might be possible using the generated RSS feed, a post for another day perhaps.